IKEA Malm Night Table Makeover!
Where to begin?
The story of these night tables spans a few years now, at least.
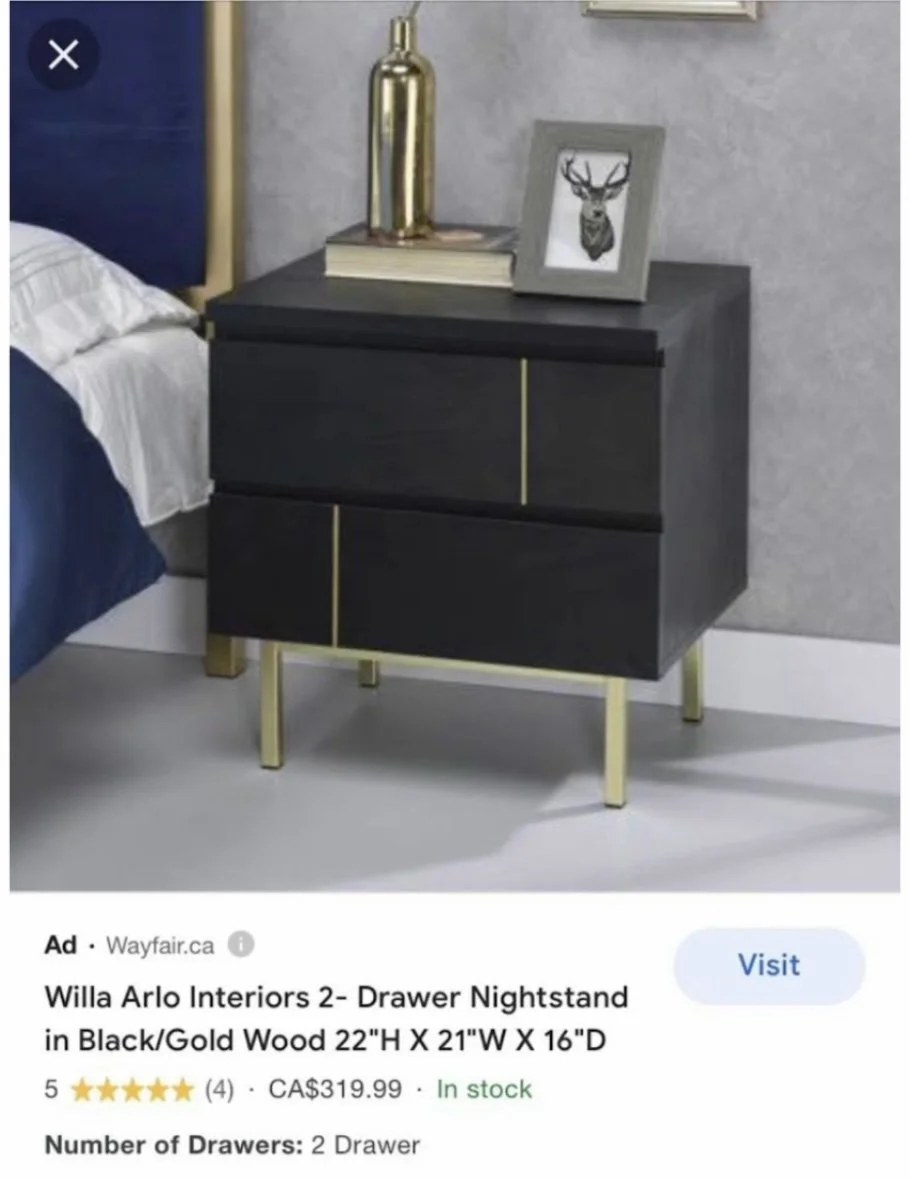
I first stumbled upon the Inso pic AT LEAST several months before I realized how the MALM would/could/did translate to a really decent knockoff of this beautifully designed table.
I had been Googling for a set color scheme for night tables to complete my bedroom design and came across this beauty at Wayfair. Knowing what I know about furniture and having been recently looking into starting a (decor) drop-shipping business, I searched high and low for this same night table on supplier sites like AliExpress and other more known furniture supply/dropship sites, and I did find it supplied in multiple places.
HOWEVER, the shipping was the obstacle that made it continually still be around that same $300 each (or more!) mark.
At least months and months and months after I had given up my search for this specific nightstand, I had started searching again, and still found things that were just so outrageously out of my ideal price range that I would never buy.
The thing is that I would be hard pressed to ever spend $300+ on a single furniture/decor item EVER. That would be THE most expensive item in my home, being the extreme thrifter that I am! And for night stands? NOPE.
BUT a good bedroom design is so fundamentally based around matching night tables. And it was also impossible to find good matching sets used online.
SO ANYWAYS, I had been a fan of a lot of IKEA hacks I saw for console tables and other things so I thought I should look into peoples’ ideas for their night tables.
I looked at several Inso photos and videos and while I saw some that I liked, they just weren’t quite the right fit for the room.
In a brutal moment of clarity it came over me. DUH. The profile of the Malm was SO similar to the inspo, that it would surely be so simple to replicate on the Malm!
The biggest hurdle was that of course, the front dimensions are slightly opposite, and that I was familiar with the Malm furniture not having solid bases in which to put legs. Hence, the added step here of adding the base.
Which is definitely the hardest step, added the most work and money. I mean the money is TRULY in the leg additions themselves.
You could EASILY just add the trim pieces and still have a solid look!
I feel like that’s enough rambling for me for now.
Check out the video for the full process.
I’m linking the legs on my Amazon (affiliate, duh) in case you really dig the ones I have used!


